July 4, 2025, by Matt Davies
3D digitisation in the Arts
The last academic year has seen an increase in 3D digitisation work here in the Humanities Building. Besides the ongoing DTH student placement to produce 3D models of artefacts from the university’s Museum, this year we worked on an exciting student placement in partnership with the Cultures, Languages and Area Studies (CLAS) department and Leicestershire County Council. The Curating, Researching, Digitising and Exhibiting (CRDE) saw students producing 3D models of 1970s toys, Victorian underwear and some eye-catching footwear all of which went into a fantastic virtual exhibition. I also had the pleasure (and challenge!) of producing 3D models of some beautiful purpose made book binders for the Fiction Under Cover – Rebinding Nabokov’s Books exhibition and website with Siggy Frank of CLAS.
The partnership between the DTH and the Archaeology Labs has also developed further this year. Archaeology lab technician Dr Susanna Sherwin and I have found that their Artec 3D laser scanners work better with certain objects than photogrammetry and vice versa. So, in the true spirit of the Nottingham Materials and Environmental Science and Heritage Laboratories (N-MESH) network of which both DTH and the Labs are members, we have been able to pool our knowledge and resources switching between- and indeed combining – methods. This has seen students on all of the projects heading back and forth between Hub and Labs to work with both me and Susie learning photogrammetry and lazer scanning.
You can find links to information on these projects at the end of this post, but the purpose here is to provide a more in-depth explainer of the actual 3D modelling processes used in the DTH and Archaeology labs, along with some of the challenges.
Photogrammetry
Photogrammetry is a method which uses multiple overlapping photographs of an object – usually captured by walking around it – to produce a photorealistic digital 3D model. Any camera can be used for this, indeed, some recent smartphones have built-in software that will process the photos into a 3D model for you. However, a general rule of photogrammetry is: the better the photographs, the better the model.
Photogrammetry in the DTH
In the DTH we use turntable photogrammetry; so instead of the camera moving around the object, the object rotates on a turntable and the camera, mounted on a tripod, stays in position. The turntable may be in a lightbox with built-in lights, lit by studio lights or a ring-light that attaches to the camera lens. Using a full-frame DSLR camera in this studio environment ensures well-lit, sharp photographs capturing as much detail as possible.
Camera settings – aperture size, shutter speed, focus, colour balance- are optimised to ensure the sharpest images (photography skills are essential). Then the turntable and camera are synchronised using a Bluetooth app so that each time the object turns, the camera shoots automatically. The advantage of operating the camera remotely in this way is that it allows longer exposure times (the shutter stays open longer, admitting more light onto the sensor) without the camera shaking and the photograph blurring.
The height and angle of the camera is adjusted after each rotation, and tripods, horizontal arms and the DTH’s height-adjustable desk are all pressed into service to ensure that all of the object is captured. Every aspect of the object should be captured in at least two of the overlapping photographs so that the software can match them up. We usually end up with 100+ photographs of each object depending on its size / complexity.

Photogrammetry shoots in the DTH with placement students
Challenges of turntable photogrammetry
The object may need to be moved during the shoot to ensure each face is captured and this can be problematic, for instance we may need to capture the base of an ancient jar with will not balance upside down. Various solutions may be deployed; at best supports made by experts, at worst Heath Robinson inspired balancing acts – with the latter not advised for the ancient jar! Obviously, any face of the object not captured will be missing from the final model, and sometimes this is unavoidable, but can be remedied to some extent when it is presented online.
Another difficulty of the shoot is that the background must remain featureless because other objects in shot that do not rotate with the object may result in the model not aligning properly. Also, anything intersecting with the object will be seen as part of it, so any supports or the edge of the turntable should be kept out of shot or blurred using the camera settings.
Software
There are many options when it comes to 3D software packages*, but they all run through a similar workflow; upload the photographs, align them, build a point cloud, build a mesh, and add texture with each of these stages having parameters too numerous and complex to go into here. Put very simply, the software looks for recurring features in the photographs, as well as using the position and orientation metadata captured by the camera, to align them. It produces a point cloud- a bit like a dot-to-dot version of the object- using the information from the alignment. It then joins the dots into triangles to generate a geometric surface or mesh. Finally, it applies the photographs to the surface – almost like wallpaper! The workflow can take between one and several hours depending on the complexity of the model and the parameters set.

Union Jack shoes being processed in Agisoft Metashape for the CRDE project
Limitations of photogrammetry
Photogrammetry software struggles with very shiny objects as it sees reflected light as a feature. Featureless expanses are also problematic as there is nothing to match when aligning photographs. It will also be confused by un-fixed features of an object as they will move between shots so are in a different position – even by tiny margins – in separate photographs. So, hair, fur, pages will blur, or may not align at all causing the model to fail. If an object needs to be flipped during the shoot, these features will almost certainly move/change position. Again, this can be remedied in some cases with props, in post processing, or the method combination discussed below.
Artec scanners
The Artec Space Spider and Micro 3D Scanner in the Archaeology labs work by sending out beams of light and recording the time it takes for them to bounce back off the object. This allows a mesh of triangles to be created matching the shape of the artefact. Then by joining up the separate scans of each object the Artec software produces the 3D model.
The Artec scanners are much faster than the photogrammetry method and more accurate in measurements, the micro scanner in particular is also far better at capturing small objects. Also, the Artec software makes it easier to manipulate the scans once captured. As the scans are sweeps of the object’s topography rather than individual photographs, they are easier to align. On the downside, the Artecs’ cameras capture at lower resolutions than a DSLR camera, so when it comes to adding texture, the surface details are not as sharp and detailed.
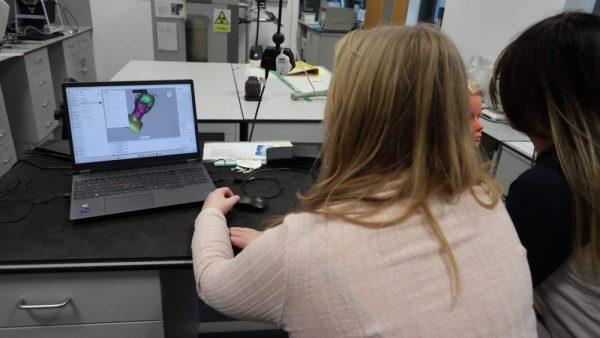
DTH Placement students working in the Archaeology labs.
Combining both methods
The texture produced from DSLR photographs during the photogrammetry workflow can be downloaded as a seperate file, which can then be uploaded to the Artec software and overlaid onto the topography it has captured. This best of both worlds approach is extremely useful if the photogrammetry software has been unable to align aspects of the model, or the surface detail of the object captured by the Artec is not detailed enough.
Going public
Like most institutions carrying out 3D work in the Higher Education, Arts, and Heritage sectors, we are using Sketchfab to make the models available. Sketchfab has many benefits in that models can be grouped into collections, shared, and embedded in webpages. Visibility can be controlled, metadata is simple to add, the models can be tagged, annotated, categorised and CC attribution added. The models can be artificially lit if required, and the way they move can be manipulated which is handy if a face is missing – so if we were unable to capture the base of that ancient jar, we can limit the vertical orbit so users cannot turn it over.
The 3D models discussed in this post are made public via the DTH’s Sketchfab page.
You can read about the CRDE Placement here.
Nottingham Materials and Environmental Science and Heritage Laboratories (N-MESH)
Fiction Under Cover – Rebinding Nabokov’s Books
No comments yet, fill out a comment to be the first


Leave a Reply